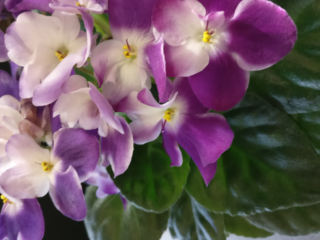
African violets bring color to any room, and it’s easy to collect seeds for growing new plants of your own! Just follow the five steps we outline below. Whether this is your first time collecting African violet seeds or not, our guide will help ensure that each step goes smoothly so that you have success every time!
Table of Contents:
- Collecting Seeds
- Preparing the Seeds
- Planting the Seeds
- Caring for Seedlings
- Transplanting Seedlings
- FAQs in Relation to How to Collect Seeds from African Violets
- Conclusion
Collecting Seeds
Collecting seeds from African violets is a relatively easy process, but it does require some patience. The best time to collect the seeds is when the seed pods are ripe and starting to open. This usually occurs about two weeks after flowering has finished. To identify ripe seed pods, look for those that have started to turn brown or yellow in color and feel dry and papery when touched.
Once you’ve identified the ripe seed pods, carefully remove them from the plant using tweezers or your fingers. Make sure not to damage any of the other parts of the plant as you do this. Place each pod in an envelope or container labeled with its date of collection so that you can keep track of which ones were collected first and last.
Next, separate out any remaining green unripe seed pods from those that are already mature enough for harvesting by gently rubbing them between your fingers until they split open easily revealing their contents inside – these are ready for collecting! Collect all viable seeds into a small container like a jar or plastic baggie; make sure not to leave any behind on the plant itself as they may germinate there instead of where you want them too!
Finally, store your collected African violet seeds in a cool and dark place until you are ready to use them; preferably at temperatures below 70°F (21°C). If stored properly, most varieties will remain viable for up to three years before needing replacement with fresh new stock.
Preparing the Seeds
Once the African violet seeds have been collected, it is time to prepare them for planting. Before doing anything else, it is important to clean the seeds and remove any debris or dirt that may be attached. This can be done by gently rubbing the seeds between two fingers while running them under cold water. It is also a good idea to sort through the seeds and discard any that are discolored or damaged in some way.
Next, it’s time to soak the cleaned and sorted African violet seeds in warm water for about 24 hours before planting them. During this soaking period, make sure to check on the water level periodically as some of the smaller pieces may float away if not monitored closely enough. Once they have soaked long enough, drain off any excess water from the container and allow them to dry completely before proceeding with planting instructions.
Coat each seed with fungicide powder by placing a small amount of the powder onto a plate and roll each individual seed across its surface until fully coated. Once this is done, transfer the seeds into your chosen growing medium after ensuring that no excess moisture remains present.
Planting the Seeds
Planting African violet seeds is an easy and rewarding process. The first step is to select the right soil for your plants. A light, well-draining potting mix that contains peat moss, vermiculite or perlite works best. Avoid using regular garden soil as it can be too heavy and retain too much moisture which can lead to root rot in your seedlings.
.png)
Next, you’ll need to prepare the planting area by filling a shallow container with the potting mix until it’s about two inches deep. Gently press down on the surface of the soil so that it’s level and smooth before adding water until it’s evenly moist but not soggy wet. You might need a mister for this, as a hose or watering can can be too full-on.
Once your planting area is ready, sprinkle a few African violet seeds over the top of the dampened soil then lightly (and we mean lightly!) cover them with more potting mix (no more than 1/8 inch). You don’t need to plant each seed individually; just scatter them across the surface of your container and they will take care of themselves! Place your planted container in a warm spot away from direct sunlight and keep it consistently moist but not overly wet while waiting for germination which usually takes around 10 days or so depending on temperature conditions. (Again, a mister will come in handy).
Caring for Seedlings
Caring for African violet seedlings is an important part of the growing process. Proper care will ensure that your plants thrive and bloom with beautiful flowers.
Watering: Seedlings should be watered regularly, but not too often. Water them until the soil is moist but not soggy. Allow the top layer of soil to dry out before watering again, as overwatering can cause root rot and other issues. Avoid getting water on the leaves or flowers as this can lead to fungal diseases like powdery mildew or leaf spot disease.
Fertilizing: Fertilize seedlings every two weeks using a balanced fertilizer such as 10-10-10 or 20-20-20 diluted to quarter strength in order to avoid burning delicate roots. Stop fertilizing when blooms appear so you don’t burn off any buds or flowers!
.png)
Light Requirements: African violets need bright indirect light for best growth and flowering results; however, direct sunlight may scorch their leaves if left in it too long. Place them near a window where they get plenty of light without being exposed directly to harsh rays from outside sources such as the sun during peak hours (midday). If possible, rotate your plants occasionally so all sides receive adequate amounts of light exposure over time; this will help promote even growth throughout each plant’s foliage structure and overall healthiness!
African violets should be kept away from drafts and extreme temperature changes, as these could damage delicate foliage structures or stunt flower production altogether. Optimal temperatures for African violets are between 65°F – 75°F (18°C – 24°C) during daytime hours with slightly cooler nights around 60°F (15°C).
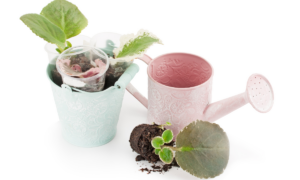
Transplanting Seedlings
Once your African violet seedlings have grown to a height of around 4 inches, it is time to transplant them into larger pots. Transplanting should be done in the early morning when temperatures are cooler and there is less stress on the plants.
Before you begin, make sure that you have all of your supplies ready: potting soil, containers for planting, and tools such as trowels or spades. It is also important to water the seedlings thoroughly before transplanting them so they don’t dry out during the process.
When transferring seedlings from their original container to a new one, carefully loosen any roots that may be bound together with your fingers or a small tool like a butter knife. Then gently lift each plant up by its leaves rather than its stem and place it in its new home. Make sure not to damage any of the delicate foliage while doing this!
Once planted firmly in place, lightly surround each plant with some additional soil if needed and then water well again until moist but not soggy.
Finally, provide plenty of indirect sunlight for your newly transplanted African violets. They prefer bright but filtered light throughout most of their growing season (spring through fall). If possible, give them an occasional misting with lukewarm water too; this helps keep humidity levels high which can help promote healthy growth.

FAQs in Relation to How to Collect Seeds from African Violets
How do you harvest African violet seeds?
Harvesting African violet seeds is a relatively simple process. First, identify the flowers that are ready for harvesting by looking for those with yellow anthers and dry petals. Then, carefully remove the flower from the plant and gently shake it over a container to release the seeds. Finally, store your harvested African violet seeds in a cool, dark place until you’re ready to use them. It’s important to note that African violets can take up to two years before they bloom after planting their seeds.
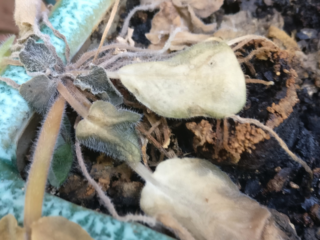
Where are the seeds in African violet plant?
African violets produce seeds on the end of their flower stalks. The seed pods, which look like small green balls, will eventually turn brown and split open when they are ready to be harvested. With proper care and attention, African violet seeds can be successfully propagated and grown into healthy plants that will bloom year after year.
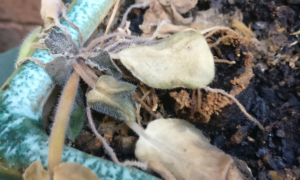
Do African violets get seed pods?
Yes, African violets do produce seed pods. These are small and round, usually containing several seeds. They form on the stem of the plant after it has flowered. The pods will eventually dry out and split open when they are ready to be harvested for propagation or sowing. Once collected, the seeds can be planted in a well-draining soil mix and kept moist until germination occurs. With proper care, these plants can provide beautiful blooms year after year!
How long does it take African violet seeds to germinate?
African violet seeds typically take between 7 to 14 days to germinate. During this time, the seed should be kept in a warm and humid environment with temperatures of around 70°F (21°C). The soil should also remain moist but not soggy. To ensure optimal germination, it is important to keep the seedbed evenly moist until the first leaves appear. (A mister can be good for this). Once they do, you can begin gradually reducing moisture levels as your African violets continue growing and developing.
Conclusion
With the right preparation, planting, and care, you can have healthy seedlings in no time! Remember that collecting seeds from African violets requires patience and attention to detail but with the right guidance, it can be an enjoyable experience for any gardener.
If you’re looking for a fun and easy way to grow beautiful African Violets, why not try collecting the seeds? It’s an inexpensive yet rewarding project that can be done with minimal effort. With just a few simple steps, you’ll soon have your own flourishing African Violet garden. So don’t wait any longer – start collecting those precious seeds today!